

- March 8, 2022
- Symphony Ragan, Project Manager, Web Content

Electronic signature solutions, such as Foxit eSign, have made it possible for individuals and businesses of all sizes to optimize the process of signing and completing important documents. The signing process with Foxit eSign is designed to enhance and simplify processes unique to your business by offering a workflow-based user interface that runs parallel to your currently established workflow. Our intuitive design will not only guide you through the sending process step-by-step on how to send your documents for signing, but it will also substantially reduce your document completion times.
Steps to Sending Your Document for signing
Sending a document for signature with Foxit eSign is simple and can be done in just a few clicks. You’ll begin by uploading your document; this can be done from the Home or Document tabs by simply dragging and dropping your file or clicking to upload from your device.
You can also upload documents from your favorite file storage apps, such as Dropbox, Google Drive, OneDrive, and Box. Our form converter automatically allows uploads in practically any format, including PDF, DOC, DOCX, XLSX, XLS, PPT, PPTX, CSV, TXT, RTF, PNG, and others.
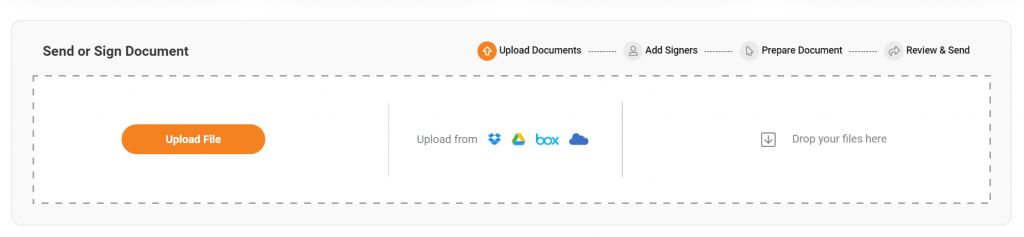
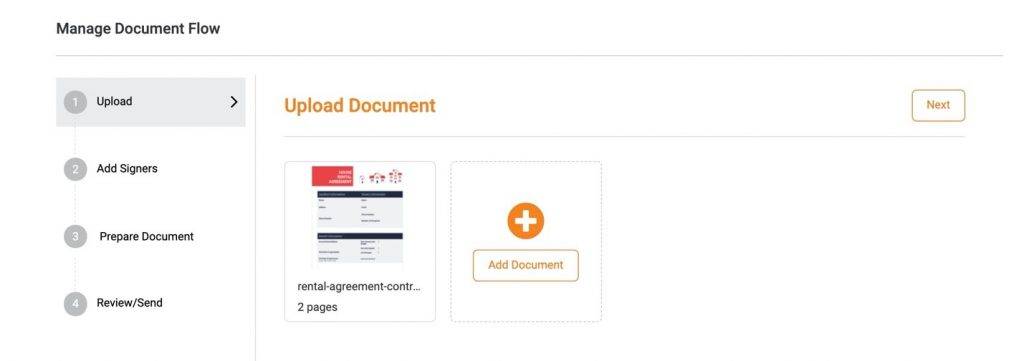
Once uploaded, you’ll be brought to the Manage Document Workflow window. This will begin the process for adding signers, preparing your document, and then sending for electronic signatures. Click next to proceed.
Next step:
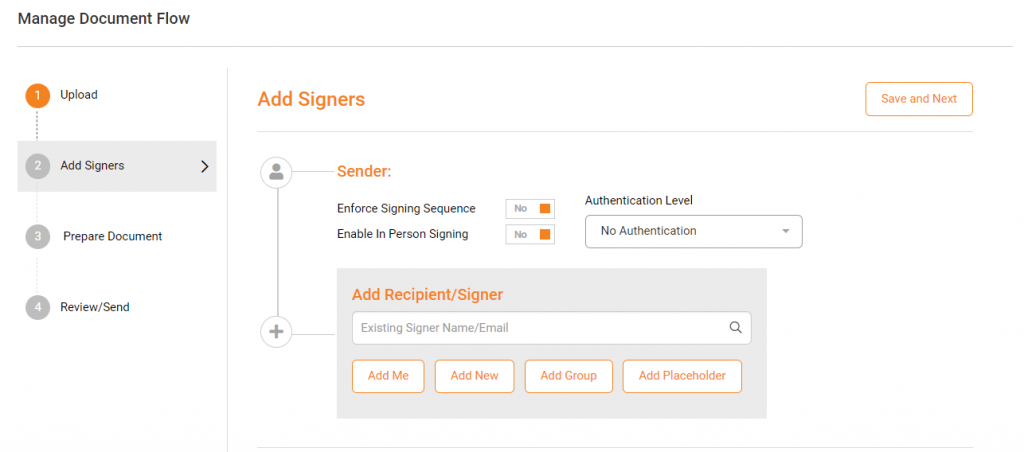
Let’s now add signatory information. Here, you can add one or multiple signers, add a group of signers for bulk electronic signatures. You can also enforce signing sequences, and decide what level of authentication you would like.
This will help to ensure that your e signature information is legally binding. E signatures can be used in a court of law – if necessary.
(e signature information can be verifiable and legally binding in a court of law if it meets certain requirements. In order for an e signature to be admissible in court, it must generally contain three elements: an intention to sign, a means of identification, and an indication of assent. An intention to sign can be shown in a variety of ways, but it must be clear that the person signing intended to create a binding agreement.
A means of identification is typically a password or some other form of authentication that is known only to the person signing. The indication of assent must show that the person signing agreed to the terms of the agreement. There are many different ways to create a legally binding e signature, but it is important to make sure that all three elements are present in order to avoid any potential legal problems down the road.)
Anyhow, we regressed…
Let’s add our signature information now.
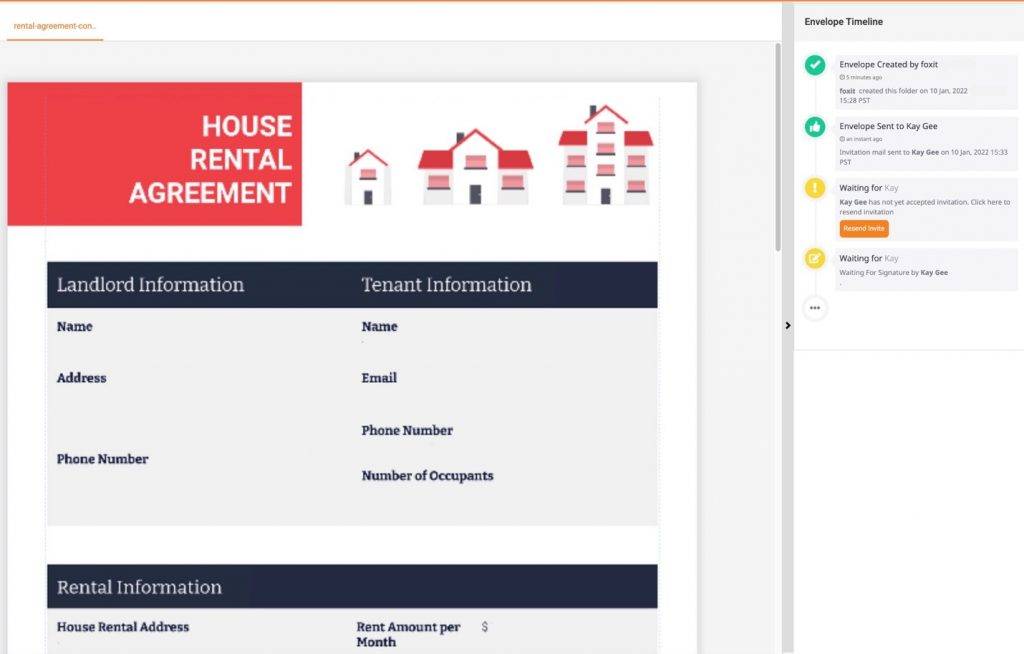
Once you’ve added your signers, click next to be taken to the Prepare Document screen. For this example, we’ll use a rental agreement PDF template.
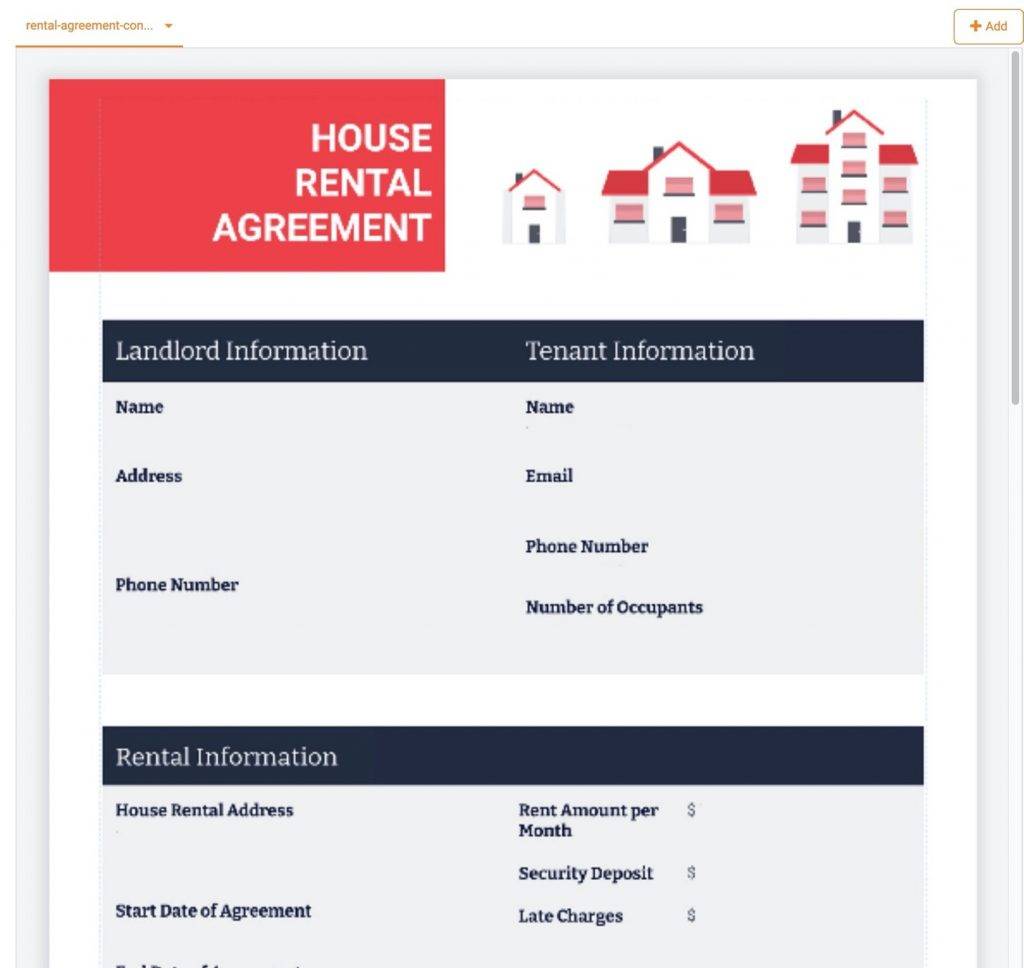
The current state of this PDF document is considered static, meaning there are no interactive fields, including for signatures. Adding signature, data, and advanced fields will be the next step in the process.
Begin by simply dragging and dropping fields as needed throughout your document. During this step, you can do things like incorporating text fields to gather information, adding checkboxes for easy answers, and incorporating signature and initial fields wherever needed throughout the document.
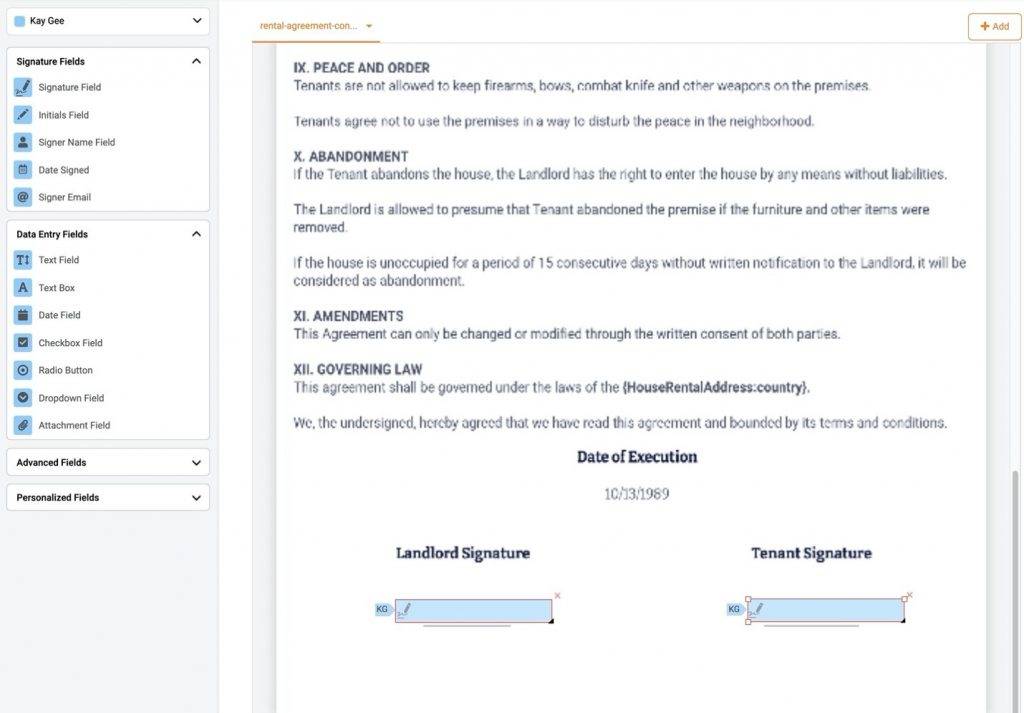
Each field can easily be assigned to different recipients and can be made mandatory for completion as needed. These features allow for simpler and more streamlined document completion as well as a reduction in error rates.
Now, it’s time to click Send and officially send your documents for signing
When you are done editing that is – LOL. You will now be taken to the final step in the document sending process. In the Review/Send step, you can customize the email and message being sent to your recipients. Once complete, Foxit eSign will then email your designated recipients so they can access the document to complete and sign a PDF.

While you’re waiting for your recipients to sign, you can check completion statuses and follow up as needed. By utilizing our detailed timeline, you have the benefit of knowing where your document is and where the bottlenecks are. Additionally, you can encourage faster completion by sending signing parties reminders.
After sending your document for electronic signatures you can choose to create a PDF template. This template is designed to make the document reusable in the future for yourself and your team.
You can also apply your company’s brand to the signing interface by uploading your company’s logo and changing fonts and background colors. PDF templates can then be used just as you would a newly uploaded document – simply add signers, modify if needed, and send. It’s that simple to sign a PDF!
Getting Started
eSignatures are a great way to get started with electronic signatures. They’re easy to use, and you can try them for free with Foxit eSign.
All you need is an email address, and you can start signing documents in minutes. eSignatures are legally binding, and they’re a convenient way to get documents signed without having to print them out.
Plus, they’re more secure than regular signatures, so you can be sure that your documents are safe.
So why not try eSign today?
You might be surprised at how easy and convenient it is.
For more details, check out our tutorial video below.
best app
A very well-designed app with functionality for writers.