

- March 29, 2022
- Symphony Ragan, Project Manager, Web Content

One of the best things about electronic signatures is flexibility – flexibility to create, flexibility to send, flexibility to sign, and flexibility to store digital PDF documents. Because we understand that different signing options are necessary and often preferred, flexibility is at the core of Foxit eSign’s design, this is why we offer multiple ways to provide documents to signatories for completion.
Many businesses choose to provide signing capabilities through URLs or embedded online forms. With URLs, users can generate signing links and place them directly on their website or send via email. Alternatively, pre-generated code allows easy embedding of forms in an iFrame directly on websites or applications. Online forms are a simple solution for when mass signatures need to be gathered.
Online form code or URL links can both be automatically generated from any reusable PDF document in a few clicks. Additionally, online forms provide complete branding functionality, including the capability to customize signing to your website theme.
Below, we’ll review the processes for creating both URL signing and embedded online forms using templates in two ways: Quick Online Links perfect for single signer templates and Online Form Creation for customized and reusable forms.
Create Online Forms
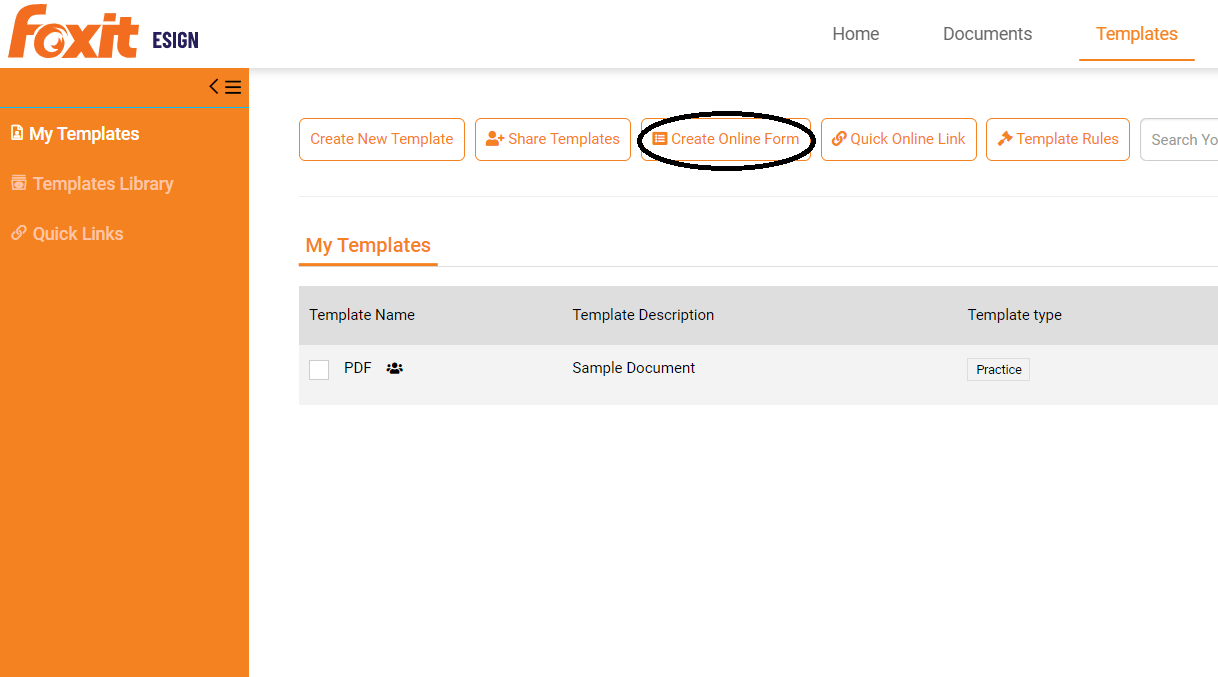
1. Navigate to the Template tab located at the top of the user interface.
2. Select the checkbox next to the Template Name of your document.
3. Click the button labeled Create Online Form.
4. In the Overview step, update the form name (if desired), choose if the form is active, select an expiration date (if applicable), and enter the maximum number of enveloped (if desired). Click Save and Next to proceed to Display Features.
5. On the Display Features step, you can edit various display options to customize the form experience, including changing the theme color. You can also choose options such as double verification of signer emails, enable document fields, and limit how many times users can duplicate the form. When complete, click Save and Next to proceed to Security.
6. During the Security step, you can select the level of signing authentication required (such as two-factor authentication) and make mobile numbers mandatory. Click Save and Next to proceed to Signers/Recipients.
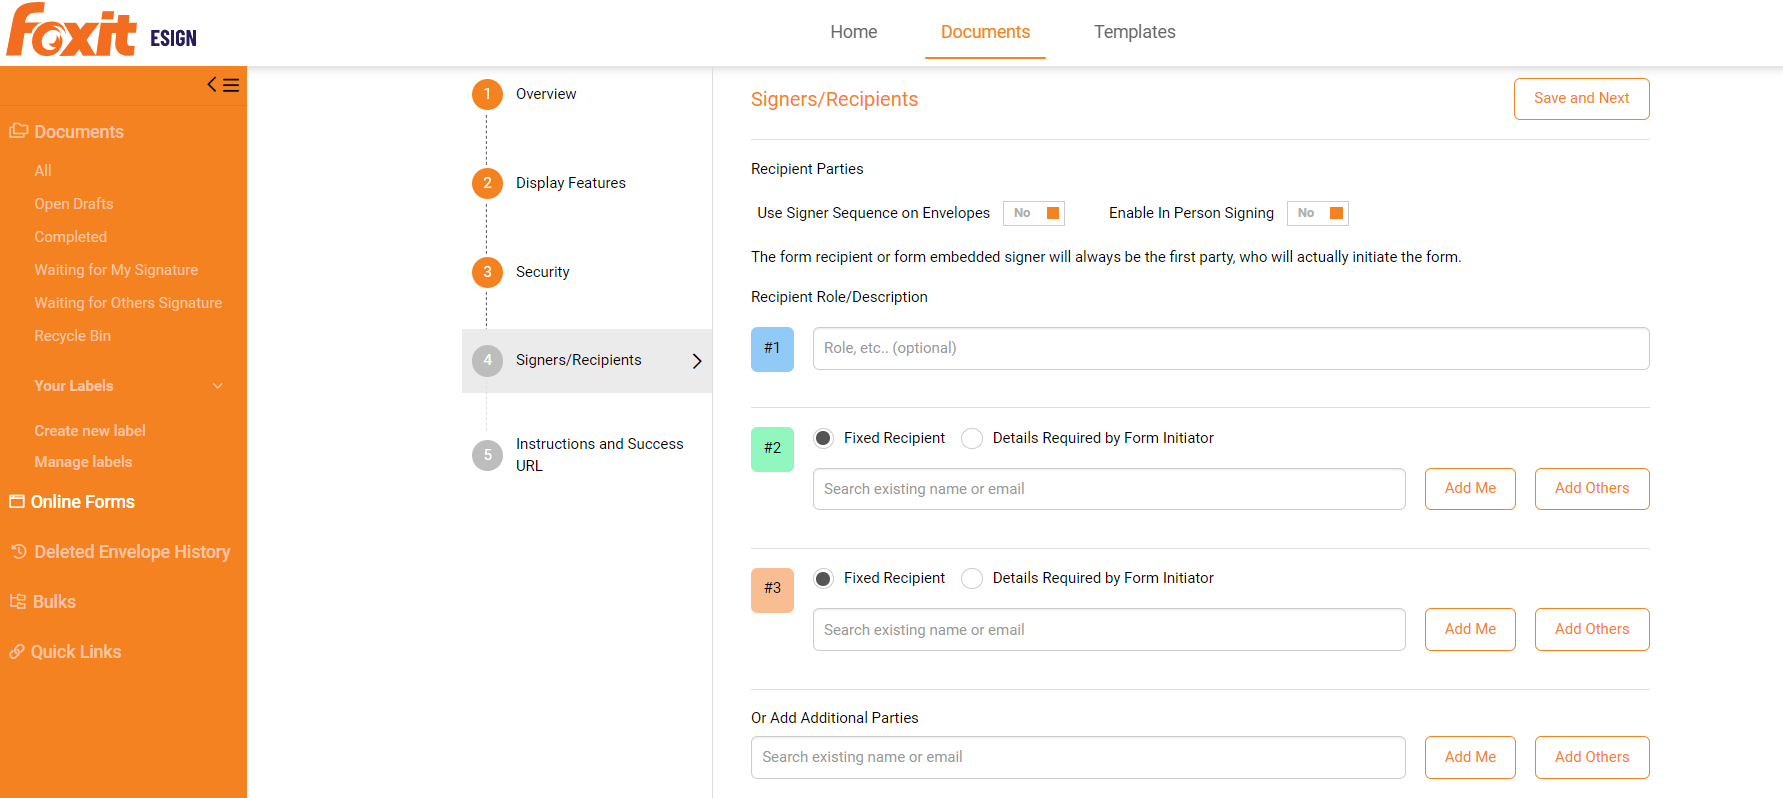
7. You have several options on the Signers/Recipients step, including the ability to enable in-person signing and enact signing sequences. Additionally, you can add pre-selected fixed recipients to the form or allow for form initiators to provide their own details. When complete, click Save and Next to proceed to the final step, Instructions and Success URL.
8. During the final step, Instructions and Success URL, you’ll be prompted to enter custom signing instructions and a completion message for signers. Choose how long your completion message should display, and specify the URL to which signers will be directed upon completion. Click Submit to generate your code.
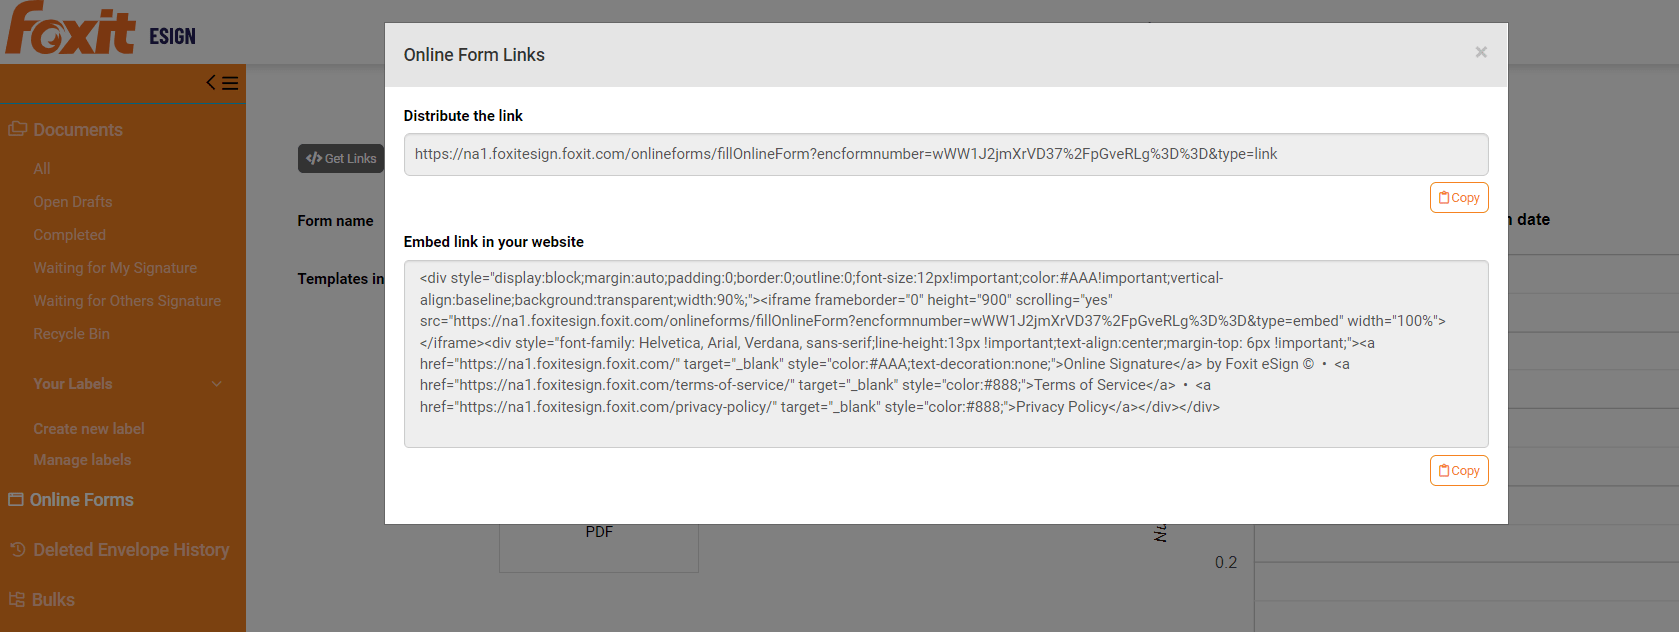
9. If you would like to send your template link via email for signing, click to Copy the URL under the section marked Distribute the Link.
10. If you would like to embed your template link into your website, click to Copy the pre-generated code under the section marked Embed Link in Your Website. This code can be pasted in your site code to display.
URL Signing Links and Embeddable Code for Single Signer Documents
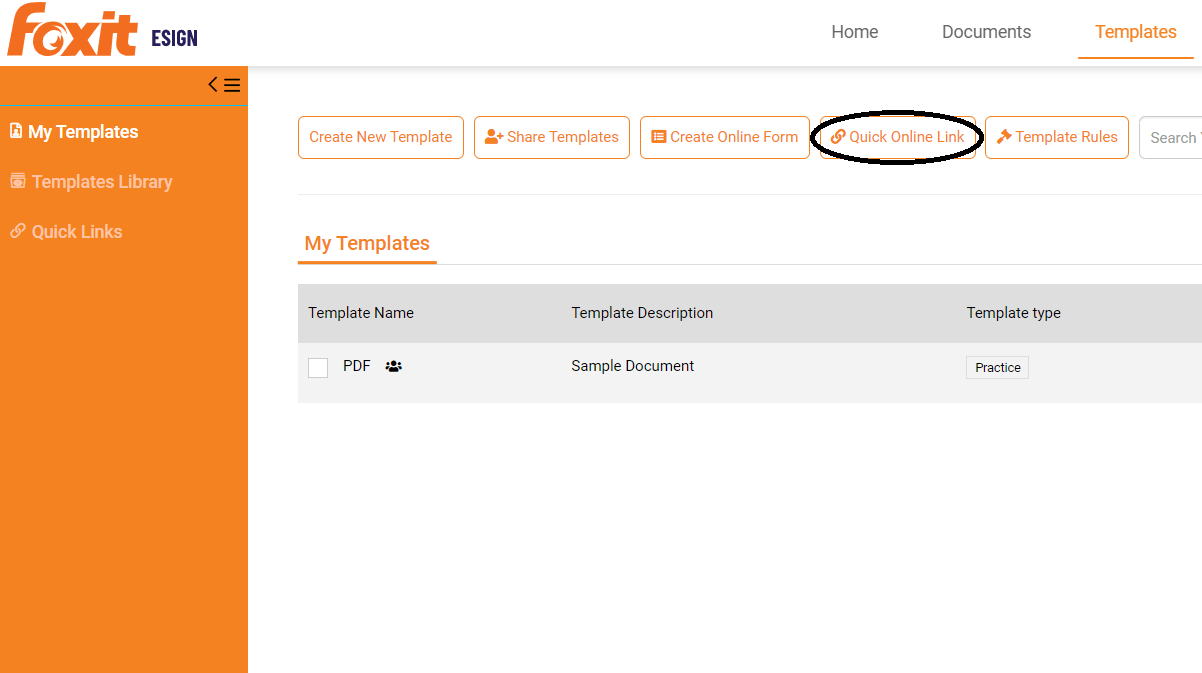
1. Navigate to the Template tab located at the top of the user interface.
2. Select the checkbox next to the Template Name of your document.
3. Click the button labeled Quick Online Link.
4. If you would like to send your template link via email for signing, click to Copy the URL under the section marked Distribute the Link.
5. If you would like to embed your template link into your website, click to Copy the pre-generated code under the section marked Embed Link in Your Website. This code can be pasted in your site code to display.
Quick Online Links will use default online form selections. To customize form and display options, take the following steps:
- Navigate to the Documents tab located at the top of the user interface.
- On the left-side navigation panel click Online Forms.
- Click the online form you would like to edit and then click Edit this Form on the next screen.
- Complete the Overview, Display Features, Security, Signers/Recipients, and Instructions and Success URL steps as directed in the online form creation steps.