- February 22, 2022
- Symphony Ragan, Project Manager, Web Content

Foxit eSign allows users to truly experience versatility in the form of document signing. Not only does our solution enable you to improve your organizational workflow with electronic signatures, it also provides tools, such as Advanced Fields, that ultimately facilitate more customization and implement more functionality into your document.
Advanced fields are easily added to any user document simply by dragging and dropping where desired. Below, we’ll take a look at what the Advanced Field options are and how they may be used during document creation and to sign a PDF.
Secured Fields
Secured fields allow a designated portion of the information provided by the recipient or signer to be masked on the document. Secured fields are beneficial when sensitive data, such as social security numbers, credit card numbers, bank account numbers, or more are needed. To mask fields, users simply need to drag and drop wherever sensitive data input is needed on the document. Additionally, font sizes and font colors may be chosen to further customize the field.
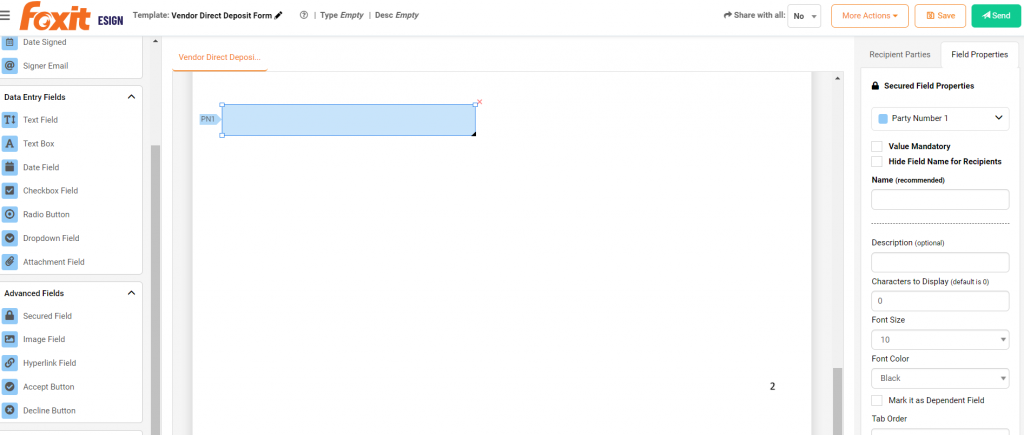
Once in place, the secured field will prevent anyone from seeing the input information, with the exception of designated characters. Secured fields are encrypted in the Foxit eSign database. During document creation, users can designate how many characters are displayed (the default character display is zero), which party(s) are required to complete this field, and if the field is mandatory.
Once the document has been completed, the full value of the field can only be retrieved via a downloaded Excel report by either the document’s author or secured field administrator, based on your company settings. You can set ‘Restrict Secured Field Access to Authorized Users Only’ to Yes in the company settings page. If account and user-level access profiles are not set, the sender will get access to secured fields by default.
Image Fields
Image fields can be dragged and dropped onto documents to allow signers to add any png, jpeg, or jpg formatted images up to 5 mb in size. The height and width of added image fields may be manually adjusted.
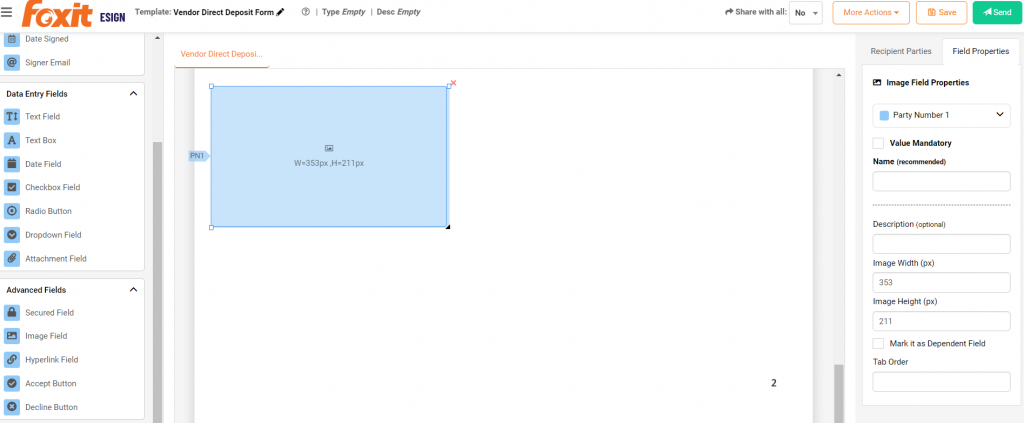
With this advanced field option, images such as notary seals, approval stamps, and personalized signature stamps can easily be added to any document along with signers’ signatures. Document image fields can be useful for any organization or department that uses e-notarizations, seals, stamps, and other required images, along with eSigning.
Hyperlink
The option to drag and drop hyperlink fields into documents enables the signing experience to be more interactive and informative for signing parties. Providing hyperlinks in documents and templates makes it easy for relevant information placed in other templates or documents to be linked to the form being electronically signed, thus promoting an even more intuitive and streamlined experience for everyone involved.
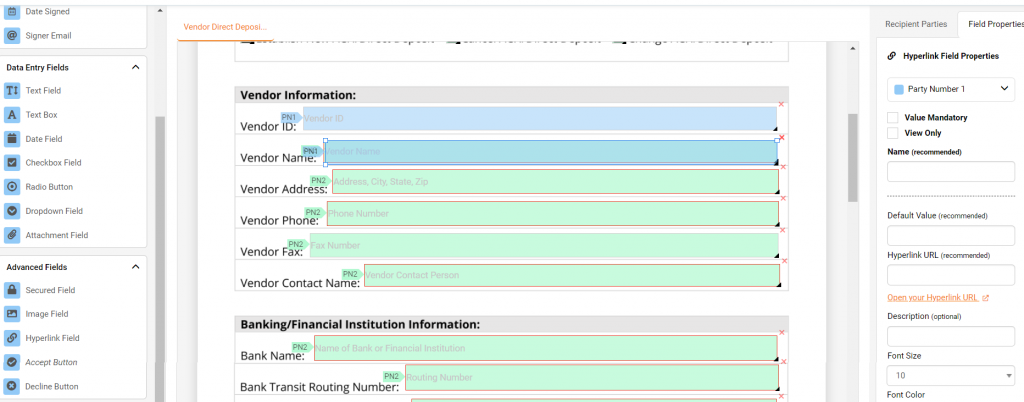
Once a hyperlink field is placed by the document creator, the URL can then be added and tested for functionality. Additionally, font sizes and font colors may be chosen to further customize this advanced field.
Accept and Decline fields
Accept and decline advanced field options enable users to not only simplify the electronic signature and document completion process for recipients, but they also provide an easy way to meet ESIGN, UETA, and other legal compliance regulations that require clear agreements to eSigning.
Document creators can drag and drop accept and decline fields onto their documents and customize instructions and confirmation text for recipients. Under the Instructions box in Settings, users may click on Sending/Signing to set custom instructions, choose if signer and confirmation text screens will populate, and indicate to which signers instructions will show.
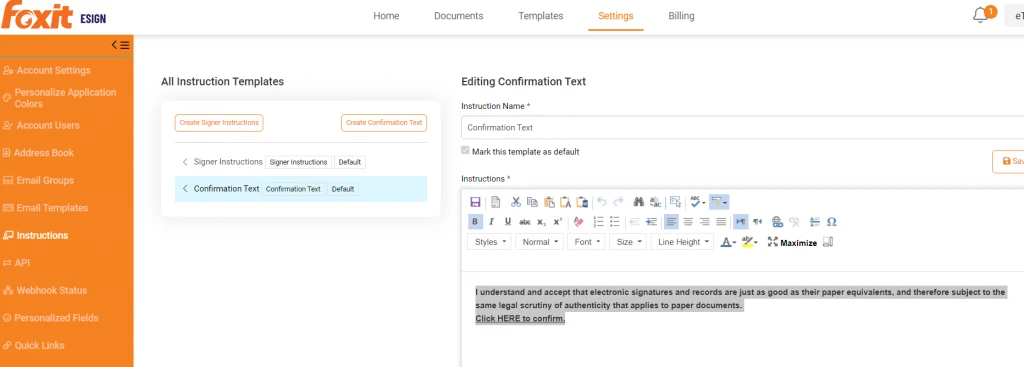
Once signer and confirmation text screens are enabled, users can click on Instructions under the settings menu to customize the messages. If custom instructions are not given, the default instructions will be used.
Example of Default Signer Instructions:
“Review the document(s) in the folder.
Fill out or edit any fields that require your input. All mandatory fields are outlined in red.
Click on the orange color ‘Next’ ribbon on the left side of the page and sign.
Confirm that you accept the electronic signature(s).”
Example of Confirmation Text:
” I understand and accept that electronic signatures and records are just as good as their paper equivalents, and therefore subject to the same legal scrutiny of authenticity that applies to paper documents.
Click HERE to confirm. “