





- December 13, 2022
- FOXITBLOG

If you want to add a checkmark to your PDF file, there are several ways to do it:
1. Use the Add Check Mark tool
This step depends upon which version of Foxit PDF Reader or Foxit PDF Editor you have:
In Foxit PDF Editor V11.1 and earlier versions and Foxit PDF Reader V11.0 and higher versions, select the Add Check Mark Tool from the Fill & Sign feature.
In Foxit PDF Editor V11.2.0, go to Protect > Foxit eSign to activate the “Foxit eSign” tab. Once activated, you’ll see the Add Check Mark tool there.
In Foxit PDF Editor V11.2.1 and above versions, go to the Foxit eSign tab to select the Add Check Mark Tool (or select the Add Check Mark Tool from the Fill & Sign feature).
- Click the desired location where you want to add the check mark.
- Click the Hand tool or press ESC to exit editing mode.

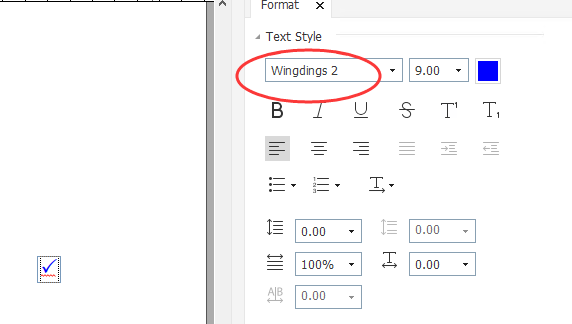
2. Use the Windings 2 Font
- In Foxit PDF Reader or Foxit PDF Editor, choose the Typewrite tool, then click anywhere on the page.
- From the drop-down font list, choose Windings 2.
- Hold down SHIFT keypad on the keyboard, and press p.
3. Use the Check Box command in the Form tab
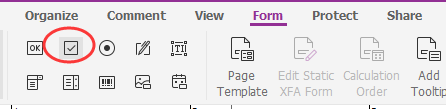
- In Foxit PDF Editor, go to the Form tab, and choose Check Box.
- Click to drag a check box on the page.
- Click on the Hand tool or press ESC to exit editing mode.
- Click on the check box to add a check mark.
4. Use the keyboard shortcut
- In Foxit PDF Reader/Editor, choose the Typewriter tool under the Comment tab.
- Hold down the ALT key on your keyboard, and type 41420 on the numeric keypad.
Note: In Windows, the shortcut for the tick mark is ALT+41420.
5. Use the Windows Character Map
- Press Win+R buttons on your keyboard to open the Run… dialog box.
- Type charmap, and then click OK.
- Find, select and copy the check mark, and then paste it onto the PDF page with Typewriter.
Once you’re satisfied, click on another section of the document and you’ll be left with the checkmark placed in the PDF document where you put it.